
Our ExpressJS API is set up and we are able to write inline documentation which is rendered in our auto generated Swagger UI. So far so good! But until now, we only worked with the example endpoints given to us by the express-generator. To show more of the functionality Swagger provides, lets add a POST and DELETE endpoint with Swagger documentation.
This post will
- Add a POST endpoint
- Add inline documentation for the POST endpoint
- Add a DELETE endpoint
- Add inline documentation for the DELETE endpoint
We will use the Swagger configuration from my previous post, so check that out if you haven’t added Swagger to your API yet. This is all based on the NodeJS and ExpressJS API setup that the express-generator provides. To set that up, check out this guide. Let’s start!
Adding a POST endpoint
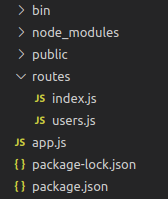
From my previous post, this is the project structure we have:
We will now add an endpoint that can be built on to create a new user with the data being posted to it.
Open the /routes/users.js file and add this POST endpoint code snippet just below our existing GET endpoint:
router.post("/", function(req, res, next) {
  var userData = req.body;
  // TODO: Add user data to a database.
  res.status(201).json(userData);
});
As you can see, we will not do anything with the user data in this post. We will focus on handling the request and sending a response. Let’s look at what is going on.
We expect the user data to be received as JSON attached to the body of our req object. After this we can handle the user data as we see fit, for instance adding it to a database to persist it. Last we return the status code 201, which tells the client that the request has been fulfilled and a user resource has been created. We also respond with the user JSON object that is created in case the client needs to update its state.
Adding Swagger documentation to our POST endpoint
The POST endpoint is handling the request and sending a response. Good. Now we are adding inline Swagger documentation which will be rendered in our Swagger UI.
Just above the POST endpoint, add this JSDoc:
/**
 * @swagger
 * /users:
 *  post:
 *      description: Create new user
 *      consumes:
 *          - application/json
 *      parameters:
 *        - in: body
 *          name: user
 *          description: The user to create
 *          schema:
 *              type: object
 *              required:
 *                - username
 *              properties:
 *                  username:
 *                      type: string
 *                  age:
 *                      type: number
 *      responses:
 *          201:
 *              description: User created
 */
Adding @swagger on the top, tells Swagger to use the following JSDoc as documentation. We specify that this is a POST request on the /users endpoint.
As a side note, Swagger expects the JSDoc to be formatted as valid YAML. Make sure that all your indentations are on point to make Swagger able to process it.
Moving down, we add a description for our endpoint and specifies that it will expect application/json as content type. The parameters property specifies that we want the data in the http body of the request and gives a name and description to it.
To be able to test this endpoint in the Swagger UI, we specify the parameters that are possible to add to the user JSON object. This is all done in the schema property. The schema property specifies that the data should be an object, that the field username is required and all possible properties are username and age.
At the end, the responses property defines that a success will result in a 201 status code response.
To look at the Swagger UI, open a command line and serve the API:
npm start
In your browser go to localhost:3000/swagger and observe the added POST /users endpoint. Click it to expand it. Under the Parameters section we can see how this endpoint expects it’s data to look like. By clicking Try it out to the right followed by the Execute button further down we can see the response from the API in the Response body section:
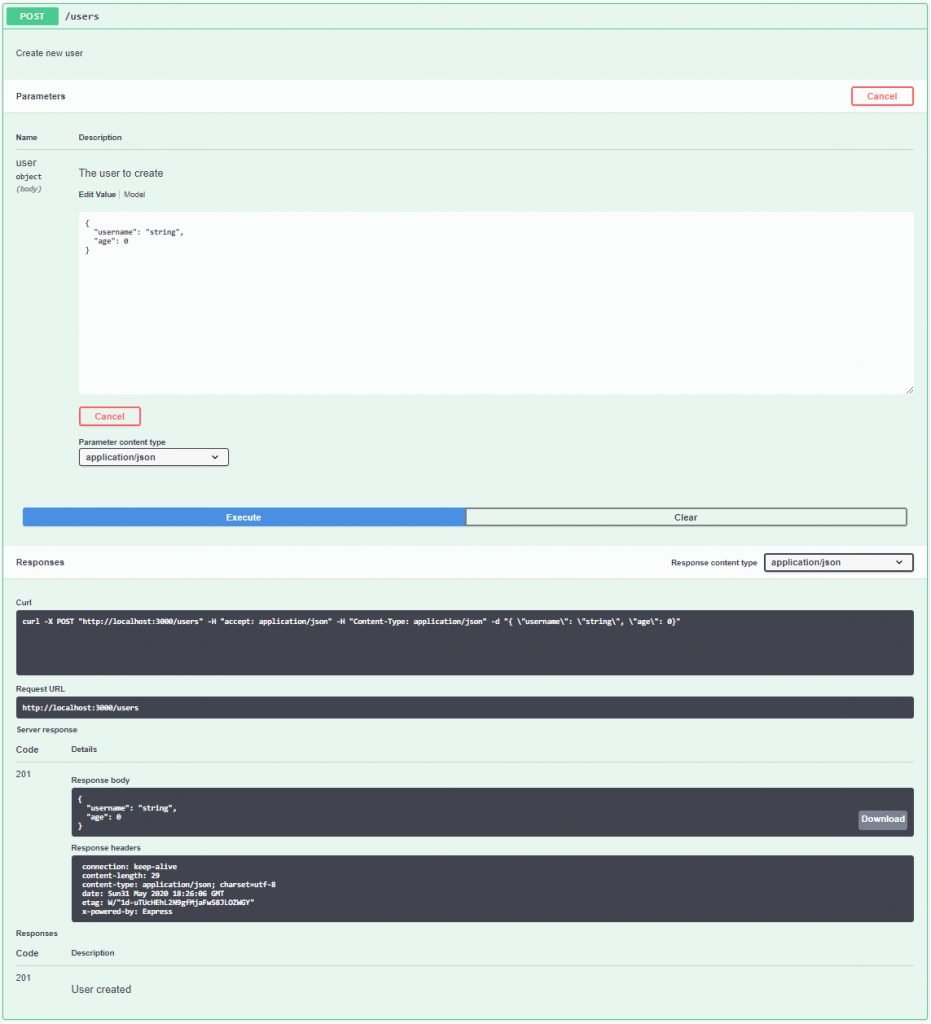
Mess around with the request JSON object values and try executing the POST request again. As you probably expect, the response is mirrored. Cool! Now let’s move on to the DELETE endpoint.
Adding a DELETE endpoint
To start off, use this code snippet to define our DELETE endpoint. It should be placed below the POST endpoint we created earlier:
router.delete('/:id', function(req, res, next) {
  var { id } = req.params;
  // TODO: Delete user with given id
  return res.json({userId: id});
});
You can see that there are some differences here from the previous endpoint we created. Obviously, the first difference is the use of the router’s delete method. Second, instead of passing data in the body of the request, this endpoint expects an id as a query parameter. The rest is rather straight forward. The method returns a JSON object with the same id that was passed to it when called.
In a real working system, you would add some functionality that deletes the user with the given id from e.g the database it is stored. But that is outside of the scope of this post.
Moving on to Swagger documentation!
Adding Swagger documentation to our DELETE endpoint
The inline documentation for this endpoint looks like this. Make sure to put it right above the delete endpoint code we just added:
/**
 * @swagger
 * /users/{userId}:
 *  delete:
 *      description: Delete user
 *      parameters:
 *        - in: path
 *          name: userId
 *          schema:
 *              type: string
 *          required: true
 *          description: string id of user to delete
 *      responses:
 *          200:
 *              description: User that was deleted
 */
At the top we specify that we want the userId to be provided as a query parameter. The rest of the structure should be familiar from the previous endpoints we have.
Serve the API (and if it is already running, make sure to stop and start it again):
npm start
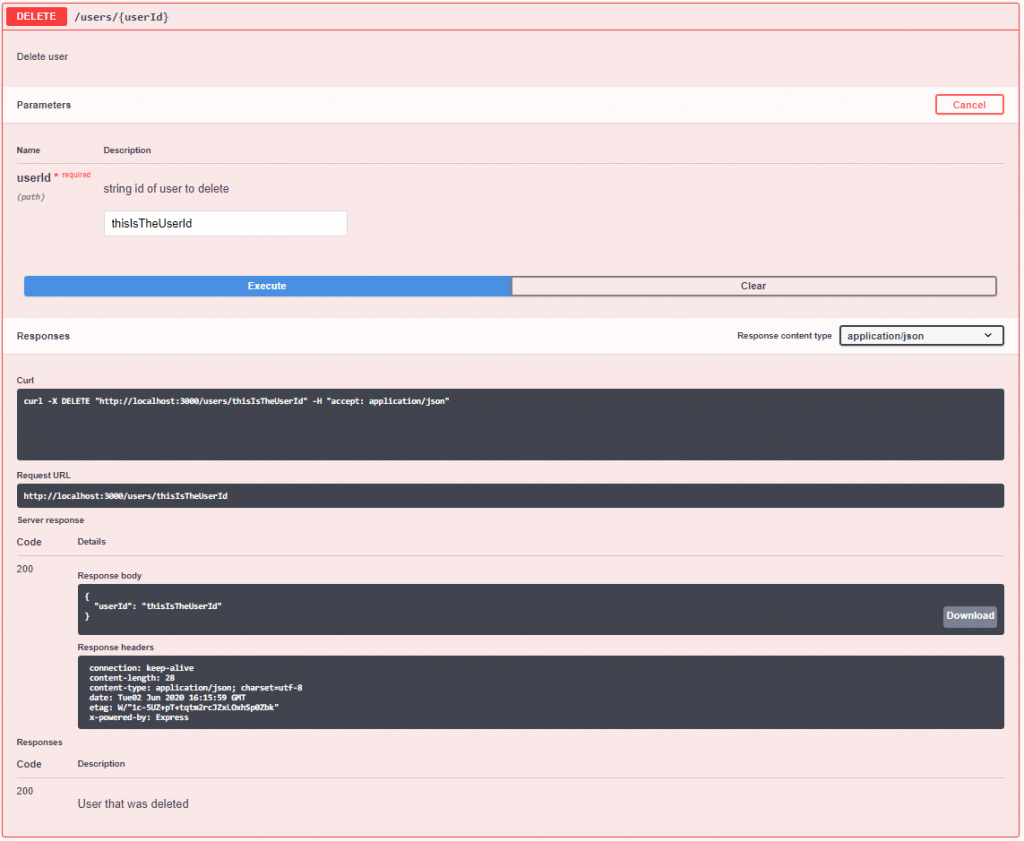
Navigate to localhost:3000/swagger in your browser where we will see the added DELETE endpoint. As earlier, give the endpoint a try. Insert a userId of your choosing and execute the call. In the Response body further down you can see the JSON response returning the same id.
The whole file /routes/users.js should look like this now:
var express = require("express");
var router = express.Router();

/**
 * @swagger
 * /users:
 *  get:
 *      description: Get all users. Not yet implemented.
 *      responses:
 *          200:
 *              description: Users of this application. Placeholder string for now.
 */
router.get("/", function (req, res, next) {
  res.send("respond with a resource");
});

/**
 * @swagger
 * /users:
 *  post:
 *      description: Create new user
 *      consumes:
 *          - application/json
 *      parameters:
 *        - in: body
 *          name: user
 *          description: The user to create
 *          schema:
 *              type: object
 *              required:
 *                - username
 *              properties:
 *                  username:
 *                      type: string
 *                  age:
 *                      type: number
 *      responses:
 *          201:
 *              description: User created
 */
router.post("/", function(req, res, next) {
  var userData = req.body;
  // TODO: Add user data to a database.
  res.status(201).json(userData);
});

/**
 * @swagger
 * /users/{userId}:
 *  delete:
 *      description: Delete user
 *      parameters:
 *        - in: path
 *          name: userId
 *          schema:
 *              type: string
 *          required: true
 *          description: string id of user to delete
 *      responses:
 *          200:
 *              description: User that was deleted
 */
router.delete('/:id', function(req, res, next) {
  var { id } = req.params;
  // TODO: Delete user with given id
  return res.json({userId: id});
});

module.exports = router;
Conclusion
We have added a POST endpoint and a DELETE endpoint both with Swagger documentation. You should now have the tools necessary to create beautifully documented APIs. Happy coding!